Update June 2017: Unity 5.6 comes with improved NavMeshes! They are now component-based, allowing for multiple NavMeshes per scene. In addition, procedurally generated and dynamically loaded content is now supported – just generate the level and set the NavMesh to Bake! 😉
Hey fellow game developer, what kind of games do you want to make?
Do you dream of creating huge open worlds, full of complex and compelling characters? Do you want to give your players whole armies to engage in massive real-time battles? Or, alternatively, do you prefer to work on the fast-paced action of first person shooters?
Here Enters Unity Pathfinding
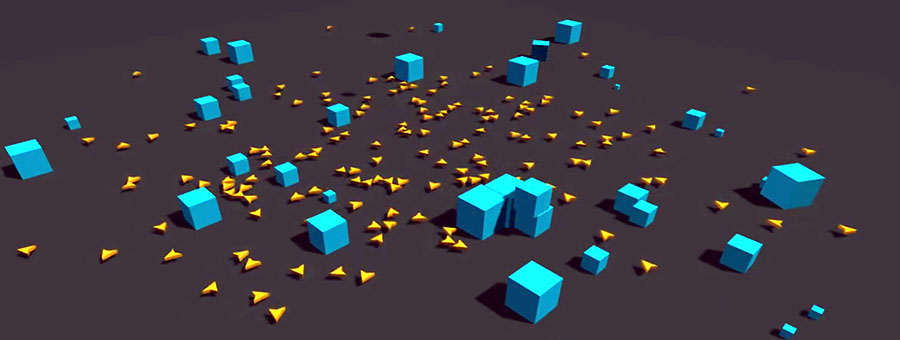
The common trait of all these genres is that your AI units need to navigate the game world. Furthermore, they need to move efficiently and with purpose. Further still, the computer controlled units should not get stuck, rotate in a circle or bump foolishly into other objects! For an immersive player experience, it is critical for all units to “stay in character”! But how do we, as game developers, make the AI characters react and adjust to the changing game environment?
We do it by using Pathfinding. Pathfinding is the collection of tools and techniques for moving units in the game world. There are multiple ways to implement it in your game, and in this post we’ll review the 3 most popular. We’ll compare Unity’s default NavMesh solution with the two most popular pathfinding Unity assets – A* Pathfinding (available here) and Apex Path (available here).
The Built-in Unity NavMesh Agents
Unity’s default solution is the NavMesh. We can bake a Unity NavMesh from the geometry in our scene (Window -> Navigation). The baking process defines the accessible areas based on the Render Meshes of the static Game Objects. After that we can add NavMesh Agent components to our moveable characters and let them roam freely around the level:).
The built-in tools are free and straight-forward to set up. However, there are multiple issues with the Unity Navmesh. The first major problem is that the mesh is baked in advance, so it can’t be changed at runtime. In result, any shape-changing dynamic objects and obstacles won’t work correctly.
Additionally, the Unity NavMesh can’t handle procedurally generated game worlds. So, if your game depends on that feature, or even if you use levels which expand gradually, you are better off using a more capable pathfinding asset. On top of that, there are some performance issues with dynamic obstacles and massive amounts of units are present on the scene.
To sum up, Unity NavMesh works great for simple games without special pathfinding requirement. Anything beyond that, and you are much better off using a dedicated Pathfinding Unity Asset.
Pathfinding Unity Assets Comparison
As you know, the Unity Asset Store offers a treasure trove of powerful tools enhancing the Unity platform. With regard to pathfinding, two systems stand head and shoulders above the rest: A* Pathfinding Project Pro and Apex Path. Both assets are popular and battle-proven; they also integrate well with visual scripting systems like Playmaker and AI frameworks like Behavior Designer.
Both Pathfinding tools are capable and would serve you well, but they do differ in several key aspects. Let’s review their pros and cons to figure out which one is best suited for your project.
Apex Path
Apex Path is a great looking, grid-based pathfinding library. It contains a clean, well organized codebase and is packed with useful features. Let’s mentions just some of them: Load balancing, Multi-threading, Height maps, Basic Steering with local avoidance and Patrol routes. Additionally, the developers of Apex Path offer other (paid) modules like Apex Steer which extend the functionality of the asset.
Its approach to pathfinding is grid-based, which means that you don’t need to bake anything in advance. Consequently, Apex Path is suitable for dynamically changing and procedurally generated game worlds (although larger RTS-style worlds can hit some performance issues). It also implements “portals” to allow units to travel between different navigation grids.
However, the biggest strength of Apex Path – the strictly enforced coding conventions – can sometimes become its weakness. The asset is clearly created with great care and precision, but it enforces a proprietary way of programming and makes you adapt to its rules. Just as an example, you would need to use Apex Path’s custom static methods instead of Unity’s AddComponent. At times, this level of abstraction makes the asset look a little over-engineered. Depending on the level of your programming abilities, and whether you would be OK with having to learn a different way of doing things, this may or may not be an issue for you. In any case, their support is quick and attentive, so even if you face issues with the scripting side of things, you would be in good hands.
To sum up, if you are looking for plug-and-play pathfinding solution for small maps (e.g. for FPS games), and you are ready to incorporate Apex Path in your project from the start, this is as good as it gets. However, already advanced projects, or projects which require larger maps, would generally be better served by other solutions.
A* Pathfinding Project Pro
A* Pathfinding (you can also see it as Astar or A Star Pathfinding) is the benchmark for quality pathfinding in Unity. Currently in its 4th version, Astar Pathfinding has a stellar 5 star rating on the Unity Asset Store from over 500 reviewers. It loads extremely quickly and is, frankly, easier to use than Unity’s default tool.
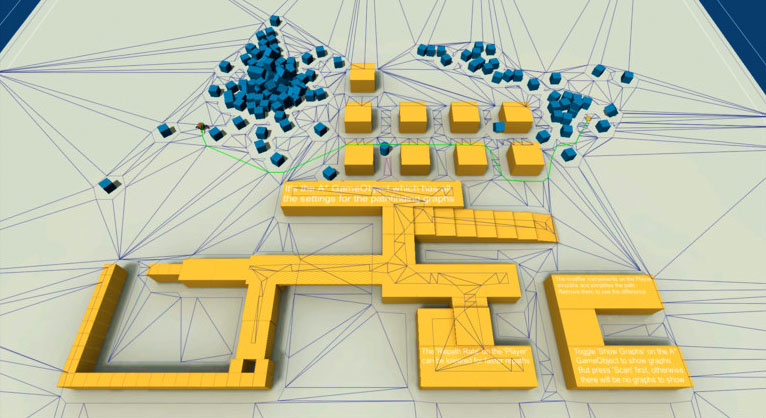
The technical details are impressive. The asset supports automatic NavMesh generation and is fully multi-threaded. It offers a selection of 3 different navigation graphs (NavMesh, Grid and Point Graph), plus various types of path post-processing and local avoidance in both the XZ and XY planes. It comes with the full source code and, of course, supports dynamic updates of the graphs at runtime.
But even after this list of accomplishments, my favorite thing about A* Pathfinding is how easy it is to use. For example, a pathfinding call takes just a couple of lines of code:
        //The Seeker component handles requesting paths from scripts
        Seeker seeker = GetComponent<Seeker>();
        //Start a new path to the targetPosition, return the result to the OnPathComplete function
        seeker.StartPath (transform.position,targetPosition, OnPathComplete);
And the good stuff doesn’t end there. Astar Pathfinding comes with 16 example scenes introducing its many features, so you can hit the ground running. The author of the asset, Aron Granberg, is also very active and helpful in responding to all kinds of questions about A* Pathfinding online at forum.arongranberg.com.
Conclusion
In order to handle Pathfinding in Unity correctly, you need to use the right tool. Hopefully now know you enough details to figure out whether you need to use Unity’s default NavMesh, or choose a dedicated Pathfinding asset. Good luck with the development and try to stay on the right path! 🙂


